
Free Pattern - Zara Earwarmer
Hi Guys,
If you have been following me on social media, you will have seen my latest pattern to come available - The Zara Sweater

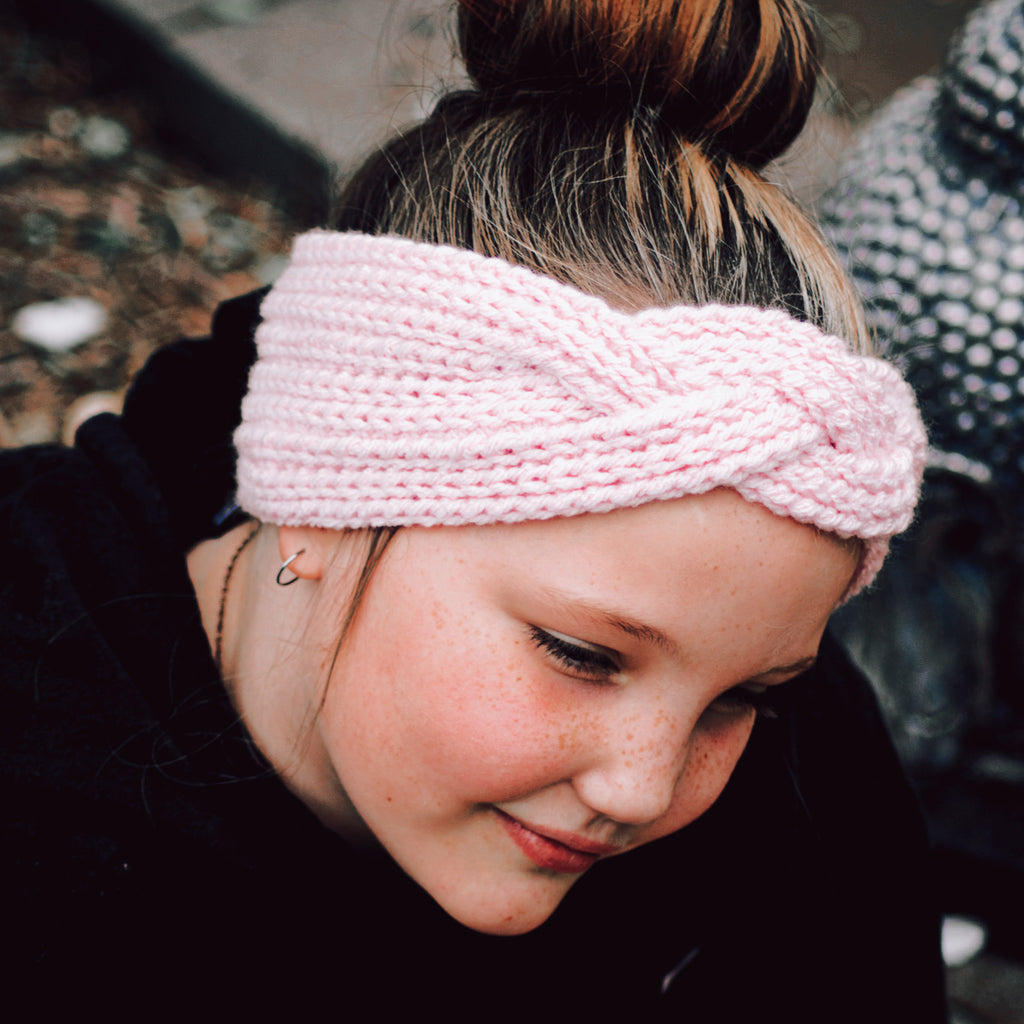
After completely falling in love with this 'knit look' stitch, I couldn't resist making up a quick little matching ear warmer pattern to match. As this is such a quick easy pattern I figured I would make it a freebie for you as well!

This pattern is made with either an 8ply(DK/number 3) yarn and 5mm hook or a 10ply(Worsted/Aran/number 4) yarn and 6mm hook. This is to match the sweater with uses the different weight yarns depending on the size sweater being made.

Construction of this ear warmer is quite simple. It is just 3 strips which are sewn side by side with a braid in the middle. The trick to this ear warmer is taking time to sew the strips together in a manner that it is near impossible to see the seams as they are hidden. Don't worry! I explain in great detail how to do this.
Something else you may find interesting about this ear warmer is how the stitches look like knit! This effect is achieved by doing a 'Yarn Over SlSt in the Back Loop Only' or YO-SlSt-BLO for short. Ill explain exactly how to do this stitch further down in the pattern. It can be a bit of a tricky stitch when you first start as it is a bit awkward but with a bit of practice you will get into a groove with it.

The full pattern is written out below for FREE, however if you prefer a printable PDF without the Ad's, you can get the download via the below links as usual!
If you enjoy this pattern, please check out my other patterns available.
You can also find other free patterns published here.

Let's Begin!
Zara Earwarmer
Sizes;
-
Sizes
Head Circumference
Ear warmer Circumference
Ear warmer Width
0-3m
38cm
33cm
5cm
3-6m
43cm
37cm
5cm
6-12m
46cm
40cm
8cm
1Y
48cm
42cm
8cm
2 & 4Y
51cm
44cm
8cm
6 & 8Y
53cm
46cm
10cm
10 & 12Y
55cm
47cm
10cm
Teen/Small Adult
57cm
49cm
13cm
Large Adult
60cm
52cm
13cm
Gauge;
YO-SLST-BLO
Sizes 0-3m to 2-4Y. 8Ply DK Yarn, 5mm hook
10cm x 10cm = 20 Stitches across and 20 Rows
Sizes 6-8Y to Lrg Adult. 10Ply Aran Yarn, 6mm hook
10cm x 10cm = 16 Stitches across and 16 Rows
Materials;
- Yarn; Sizes 0-3m to 2-4Y only – 8ply DK Weight Acrylic Yarn. I used Paintbox Simply DK. 50grams
- Yarn; Sizes 6-8Y to Lrg Adult only – 10Ply Aran Weight Acrylic Yarn. I used Paintbox Simply Aran. 50grams
- Hook; Sizes 0-3m to 2-4Y – 5mm. Sizes -6-8Y to Lrg Adult – 6mm
- Yarn Needle
Abbreviations - US Terms;
- Sc - Single Crochet
- 'YO-SlSt' - Yarn Over Slip Stitch
- 'YO-SlSt-BLO' - Yarn Over Slip Stitch in the Back Loop Only
- SlSt - Slip Stitch
- Ch - Chain
Notes;
YO-SlST = Yarn Over, Insert hook, Yarn Over, Pull up loop and pull through the 2 loops on the hook.
Ear Warmer is made my creating 3 long strips which are then seamed side by side with a small braid in the middle. Ear Warmer is then sewn into a loop by a seam at the center back.
Chain stitches at the end of the row are not included in the stitch count.
Stitch count is 1 less than the starting chain for each size and does not change. Photos shown are size 1Y unless advised otherwise.
For the strips, I have put all sizes together based on yarn used, so make sure you have the correct stitch count;
0-3m(3-6m, 6-12m, 1Y, 2-4Y) and 6-8Y(10-12y, teen/sm adult, lrg adult)
The Pattern;
Size 0-3m (3-6m, 6-12m, 1Y, 2-4Y)
Creating a strip – Make 3x. 8Ply Yarn, 5mm hook
Chain 60(68, 74, 77, 81)
Row 1 – Starting in the second Ch from your hook, YO-SlSt 59(67, 73, 76, 80), Ch 1, Turn. You need to work into the back of the Ch in order to get the hidden seams once the strips are joined together. Rotate chain towards you and insert hook into the lower loop below the center bump.


Row 2 - 3 – YO-SlSt-BLO 58(67, 73, 76, 80), Ch 1, Turn.
Stop here and tie off for sizes 0-3m and 3-6m only.
Row 4 & 5 – YO-SlSt-BLO -(-, 73, 76, 80), Ch 1, Turn.
Stop here and tie off. Move to the 'Construction' section further down.
Size 6-8y (10-12y, Teen/Sm Adult, Lrg Adult)
Creating a strip – Make 3x. 10 Ply yarn, 6mm hook
Chain 67(69, 75, 79)
Row 1 – Starting in the second Ch from your hook, YO-SlSt 66(68, 74, 78), Ch 1, Turn. You need to work into the back of the Ch in order to get the hidden seams once the strips are joined together. Rotate chain towards you and insert hook into the lower loop below the center bump.
Row 2 - 5 – YO-SlSt-BLO 56(68, 74, 78), Ch 1, Turn.
Stop here and tie off for sizes 6-8Y and 10-12Y.
Row 6 & 7 – YO-SlSt-BLO -(-, 74, 78), Ch 1, Turn.
Stop here and tie off.
Construction.
Construction is the same for all sizes.
Finding the ‘right side’ vs ‘wrong side’
Each strip has a right and wrong side. To get a flawless finish to this ear warmer you need to make sure the strips are all laying the right way up.
The ‘Right Side’ of the strip will have the starting chain sitting towards the back, almost hidden by the first raised ridge.

The ‘Wrong Side’ of the strip will have the starting chain sitting at the top of the work and you will have less rows of ridges

Sewing the First Side
Take 2 of your strips and lay them horizontally next to each other, right side up with the starting chain edge towards you.

Fold the top strip over onto the bottom strip, right sides together.

Insert hook through the last St on the right, going through the Starting Chain loop of the top Strip and the BLO of the last row of the bottom strip. Sc together.

Continue to Sc the two edges together, going through the Starting chain on the front strip and BLO of the back Strip. You are only going to Sc part of the way across – See different sizes below;
Size 0-3m (3-6m, 6-12m, 1Y, 2-4Y)
Sc 21(25, 28, 30, 32),
Size 6-8y (10-12y, Teen/Sm Adult, Lrg Adult)
Sc 24(25, 26, 28),

Tie off. Open back out flat. If seamed correctly, the seam should be hidden in between the two ridges when viewed from the right side.

Lay your third strip horizontally above your joined strips, right side up, starting chains both facing you.

Fold the top strip over, right sides together in the same manner as you did the first time. Again, Sc part way along the same number as specified previously, going through the starting Ch of the front strip and BLO of the back strip. Open back up and lay flat.


Creating the Braid
Rotate your work so it is laying vertically in front of you with the sewn end up the top and the 3 strands laying towards you. Braid the ends 5x making sure not to twist any of the strands. If you do not know how to braid, I’ve put instructions below:

Take the Left strand and cross it over the top of the middle strand. This left strand now becomes the new middle strand.

Cross the Right Strand over the Middle Strand.

Keep alternating crossing the left and right strands over the middle strand 3x more times. (You can add more or less braids if you wish)

Complete Sewing
Rotate your work sideways with the sewn side on the left. You may wish to secure your braid in place temporarily with spare yarn so it doesn’t unravel while trying to sew the second side.

Fold the Middle Strip over onto the Bottom Strip, Right Sides together. In the same manner as the first side, Sc along the same amount of Stitches as previously noted. Working through the FLO of the Front Strip and the Starting Ch of the Back strip.


Unfold and turn the Top Strip down onto the Bottom Strip, right sides together, lining up the seam.

Sc the seam together in the same manner as the last seam.


Fold the headband in half, bringing the short ends together, right sides together. Sew or SlSt the ends together to create a loop. Flip ear warmer right side out and your finished!


